Monday, March 28, 2016

Git server setup on Amazon AWS EC2

This post describes how to set up a secure git server on an Amazon EC2 instance, although this basic approach should work with any cloud provider that allows you to easily create an ubuntu virtual machine (instance).

Before beginning I should note that this setup is optimal for those who need a simple, secure git server for a small number of users. If you need a more complete collaboration environment or can tolerate a less secure footprint, you might look at gitlab, which has pre-configured AMIs (except for the govcloud), or a private setup on a service like github.

Obviously, you'll need to set up an Amazon AWS account, which is quite easy. Then you create an instance using default the AMI for Ubuntu (using HVM virtualization). A t2.nano suffices. Make sure that the port for SSH (22) is open to any IPs you might use. 

I chose to use two volumes. One with the root image (unencrypted, magnetic storage), and a second, encrypted volume to serve as /home and contain the repositories, for added security. You could skip this if you want but it will be less secure.

After the instance has launched, ssh into the public IP using the key from amazon and the ubuntu username.

First update the system and get git:
sudo apt-get update
sudo apt-get upgrade
sudo apt-get install git

Now as root (sudo su -), create a filesystem on your second, encrypted volume:
mkfs -t ext4 /dev/xvdb
e2label /dev/xvdb encrypted_home

Mount it and move the home directories to the encrypted volume:
mv /home/ubuntu /
Add line to /etc/fstab
LABEL=encrypted_home /home ext4 0 0 1
Try to mount it as it would at boot-up:
mount -a
Run mount to check it's loaded
mv /ubuntu /home
check with another terminal that you can still log in.

Create a user and home directory for git
sudo useradd -m -d /home/git -U git
sudo su git

Setup ssh for git:
mkdir ~git/.ssh && chmod 700 ~git/.ssh
touch ~git/.ssh/authorized_keys && chmod 600 ~git/.ssh/authorized_keys

Ideally, for small numbers of users, each user should create their own secure key pair on their local machine (you might consider other solutions for large userbases):
ssh-keygen -f ~/.ssh/securegit -C 'Secure Git' -N '' -t rsa -b 4096
chmod 600 ~/.ssh/securegit
If you have many users, you could consider a solution like gitolite.

Users can then edit their ~/.ssh/config to add the following entry to the top (create the file if it doesn’t yet exist):

Host secure-git AMA.ZON.IPA.DDR
User git
Hostname AMA.ZON.IPA.DDR
Ciphers blowfish-cbc
Compression yes
IdentityFile ~/.ssh/securegit

This will configure their ssh client to use the key they just generated whenever connecting to the server’s IP (replaced for AMA.ZON.IPA.DDR) with user git. It also creates an alias ‘secure-git’ for the IP, enables strong ciphers and compression for the SSH session.

Users can then provide the admin user with their public key. Back on the git server, for each user's public key securegit.pub:
cat securegit.pub >> ~git/.ssh/authorized_keys
Have them test that they can ssh into git@secure-git with another terminal (this will only work until we setup git to respond to ssh, in the next steps).

Next, repositories need to be added. As git user (sudo su git -):cd
mkdir project.git
cd project.git
git init --bare


And now, let's lock down git access (also as git):
mkdir ~/git-shell-commands
cat >~/git-shell-commands/no-interactive-login <<\EOF
#!/bin/sh
printf '\n%s\n\n' "You've successfully authenticated, but interactive shell access is disabled."
exit 128
EOF
chmod +x git-shell-commands/no-interactive-login

As root (sudo su):
echo `which git-shell` >> /etc/shells
chsh -s `which git-shell` git

Make sure that when you reboot, everything still works. You're now set up with a secure git server in the cloud. For long term use, you can change this to a reserved instance to save on fees. In addition to the EC2 instance, you'll be paying for the storage of the two volumes and outgoing traffic to the internet. 

Recovery

If you mess up at a late stage in setup and lock yourself out of your instance (ie, if you misconfigure SSH or cause it to fail to boot; at an early stage, just delete it and start over), you can mount the root volume on a temporary instance and fix the damage, as follows:
  1. Create a new ubuntu instance and stop the original ubuntu instance.
  2. Detach the root directory volume from the original instance. Attach it to the new instance as /dev/sdf. Also detach the secure home volume.
  3. Mount the volume to the new instance: sudo mount /dev/xvdf1 /mnt  (see available volumes with lsblk)
  4. Fix whatever you broke on the old volume under /mnt and then sudo umount /mnt. Stop the instance.
  5. Unfortunately you cannot re-assign this volume to the original instance's boot device. You need to create a new instance cloning the original. Start by creating a snapshot of this fixed volume. (Volumes, right click->create snapshot)
  6. Also create a snapshot of your secure home volume.
  7. Create an AMI of the fixed root snapshot. (Snapshots, right click->create image). Use hardware-assisted virtualization. Add the secure home volume as the snapshot for the second volume (as /dev/sdb).
  8. Now create a new instance using this new AMI. (Instances, Launch Instance, find it under My AMIs). You should be able to access it again, and can reassign the elastic IP if applicable.
  9. If you wish, you can terminate the old instance, delete any old volumes and the AMI / snapshots you created (although the snapshots are useful backups and the AMI takes no space beyond the snapshot).

Saturday, February 13, 2016

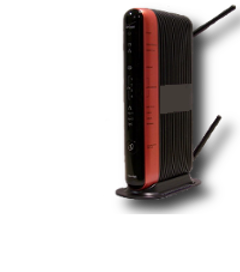
Troubleshooting Verizon Fios Router WiFi Instability

My folks have a router model MI424WR-GEN3I which they rent from Verizon Fios.

Beginning in Fall 2015, after a year of good functioning, they began experiencing instability with the wireless portion of the router. Specifically, after a period of a few hours, days or weeks:
  • New wireless clients would fail to connect to the wireless network, even when the WPA2 password was correct.
  • As their leases expired, existing clients could not renew their leases and thus could no longer access the network either.


What is most bizarre about the situation is that the wired clients continued functioning normally. Ethernet works. Wireless stops working. This is not an issue related to the WAN connection or Verizon's servers. Quite a few issues have now been ruled out:
  • Radio interference, the issue verizon's help desk keep returning to cannot be the explanation:
    • They live in the exurbs and have little radio interference. The router is in the basement, shielded by concrete and soil.
    • Standing directly next to the router, no matter what device is used, does not affect one's ability to connect. When the router is exhibiting the issue, none can.
    • There is no notable change in the electromagnetic environment of the house, like a new microwave or other appliance, nor any pattern of outages happening when any electrical device is being used.
    • During outages, some devices continue to work for some time (eventually they just can't re-authenticate).
    • Both the router and other devices show almost no other networks in the area, all of which are weak. The signal strength shown by clients for the network in question is good, even when the problem is ocurring. It's not that the network can't be seen or is weak, it's that you can't (re-)connect/authenticate.
    • Changing the wireless channel being used has no effect.
  • Issues with the wireless clients:
    • This happens to portable devices (phones, iPads), laptops and different operating systems (android, iOS, windows). Eventually all are affected.
    • It is remotely possible that some incompatibility with some client device is causing the router software to bonk after some time, but the devices being used are all pretty standard, and it doesn't seem to matter which devices are on a network when outages occur.
  • Some kind of virus or something on a client
    • Verizon technicians seem to think this is a possibility, but even if some client did have one (and they almost certainly don't) I can see no way in which this should affect the wireless portion of the router (only) and go away after resetting it.
  • An issue with the specific Verizon router. This was my first thought, that probably something had caused the wireless radio to begin failing or some other hardware problem
    • Verizon has now replaced the router not once but twice, and both replacement routers began experiencing the exact same problem (and only that problem), after a matter of days. The only special configurations they had in common were:
      • Opening a single (SSH) port for forwarding, and of course some UPnP ports.
      • The existence of a wired client which regularly transfers data.
      • A custom WPA key and network name.
    • I should say that both the replacement routers were "refurbished" units, which may or may not have had any real refurbishment performed after customers returned them. I can only speculate about this, but given that the routers all pass a self-test even while exhibiting the problem, and that when you first turn them on they appear to work perfectly fine (the problem takes a minimum of a few hours to begin happening), it is quite possible that Verizon thinks nothing is wrong with them and is simply returning other peoples' broken routers to the next guy expecting that the real problem is incompetent customers returning perfectly good routers (I get the sense that's what the agents think anyway). 
    • All of these routers were, at the time of the issue, running firmware version 40.21.18.
  • Like I said, the internet connection continues working fine as can be verified via wired connection, so that seems to rule out issues with the ONT or other Verizon network infrastructure.
The issue can be "remedied" (temporarily, until the next outage randomly happens) by either turning off wireless radio from the router configuration software and turning it back on, or by resetting the whole router. ADDENDUM: When the issue happens, under System Monitoring -> Advanced Status -> "Full Status / System wide Monitoring of Connections", Wireless Access Point "Status" shows "Disconnected", even though under Wireless Settings, the wireless network is "On". It remains unclear what causes it to become "disconnected" or why it fails to re-connect.

This problem is very puzzling and remains unresolved. I'll most likely have to "resolve" it by buying another wireless router and plugging it into the Verizon router via ethernet, then disabling the Fios internal wireless capability. It's pretty frustrating that you have no choice to replace the Verizon router altogether.

Given the lack of great options, I'm asking you, dear internet, if you are seeing similar issues. I don't trust that Verizon will find them themselves, and Verizon agents appear to be well off the scent.

The only realistic possibilities I see are that:
  1. This is a common flaw that is either tolerated by customers or not correctly diagnosed, possibly since so few people use ethernet.
  2. I've really got bad luck and managed to get three routers which all exhibit the same problem with the wireless radio (possibly because they don't fix it when refurbishing units). A fourth time might be the charm.
  3. There was some automatic update to the firmware last fall and the new firmware (40.21.18) contains this bug. As I noted, it's possible the firmware might have some incompatibility with other implementations of the 802.11a/b/g/n protocol(s). But the most likely device that would be would be iPhones (the only new one on the network since the problems started happening), so again, you'd think lots of customers would see it.
Any comments or suggestions are most welcome.

Friday, October 2, 2015

DD-WRT on Netgear AC1450

As it comes, Netgear's AC1450 router is quite lousy, with buggy firmware, lots of crashes and limited throughput. However the internet figured out that the actual hardware is identical to the more expensive, better performing R6300v2 (AC 1750) router. It is possible to simply convert the router and use the R6300v2 router's firmware.

But we'll do even better and install DD-WRT's firmware, giving this inexpensive router better functionality than one costing several times more. If you want a DD-WRT router, this is an excellent choice. It's a dual band, dual network, 802.11ac router supporting 450Mbps (2.4Ghz) + 1300 Mbps (5Ghz) speeds (both 3x3 receiver-transmitter antennas), with two USB ports, one of them USB 3.0, 4+1 gigabit ethernet ports, a fast dual-core 800Mhz (ARM v7) processor, 128MB flash and 256MB RAM. You can find it new or refurbished on Amazon*.

Although hard to find, the steps to open up the capabilities couldn't be easier. Here's the summary:

1) Download the two files from ftp://ftp.dd-wrt.com/betas/2017/*/netgear-ac1450/, where * is a release that seems to work well according to users of the dd-wrt forums (I used 09-28-2015-r27858 and did not see issues -- Update: I would now recommend a more recent build like 09-29-2016-r30709 for security improvements.)

2) If the router is not new, reset first by holding down the red button on the back for 10 seconds. From the stock firmware web GUI choose manual (advanced) setup, and login with the admin user/password printed on the bottom of the router. Then choose router update. Select the factory-to-dd-wrt.chk file and flash. (Continue anyway if it says it's installing the same version). Whenever flashing, be patient and be sure that the power remains connected. It should boot back up automatically after some delay.

3) The router will reboot and open the DD-WRT web GUI. Don't set this up (apart from the mandatory username/password). Just go to Administration -> Firmware Upgrade. Select the second file, netgear-ac1450-webflash.bin and flash with reset to default settings.

DONE! After rebooting, you now have a great, fast full-featured DD-WRT router. More information about DD-WRT and how to set it up for your needs is available on the DD-WRT Wiki page.


* Really appreciate if you purchase via these links as I'll get a small commission at no cost to you.

Wednesday, September 30, 2015

"Improving" Sony Xperia Z1 Compact D5503

It was time for a new phone since my old one has unfortunately kicked the bucket. Luckily I found the Sony Z1 compact, which is totally badass and an amazing bargain given the specs. It's available on Amazon (also in white, pink, or lime green).* Really happy with my purchase so far.

Mine came carrier unlocked so any SIM card will work -- that's an absolute requirement for me as I travel a lot. On previous android phones, I would install a custom ROM (version of Android) in order to rid myself of the carrier and manufacturer bloat and add functionality. However, Sony's version of Android is streamlined and I like it so far. Plus, unlocking the bootloader (which is necessary to use a custom ROM), although easy to do, has downsides. It may void the warranty and more importantly reduce the quality of the camera and break anything requiring DRM. Plus custom ROMs may not have all the useful features Sony has, particularly power saving modes.

However, it's possible to root the phone without unlocking the bootloader. You'll have the stock ROMs and experience with a rooted phone that you can largely customize. In particular you can install the XPOSED framework to install XPrivacy, which like Privacy Guard in CyanogenMod allows controls over app permissions. It also allows me to run apps like AirAudio that require root. And at a pretty basic level, with root I can back up the phone.

My Z1 Compact was loaded with Android 4.4.4 Kitkat.
This guide will root the phone and upgrade it to Sony's stock Android 5.1.1 Lollipop, without wiping any software/settings

** UPDATE 2/14/2015 with the latest versions of apps and how to root if you're already on Lollipop (5.*) **
** UPDATE 12/7/2015: it is possible to upgrade to the latest firmware version 14.6.A.1.236 using this procedure (in step 7). If you already had upgraded to rooted 5.1+ you can just do step 7+ to get the latest firmware. This update includes the stagefright 2.0 fixes. (If you use Xposed be sure to get the latest version of that as well.) **
  1. Download the latest flashtool software and install it. (You can get a head start by now downloading the firmware needed in step 7.1)
  2. Once installed, go to flashtool's drivers subdirectory and run the drivers installation found there. Choose flashmode and flashboot, along with drivers for the Z1C. It'll likely take a few minutes.
  3. My phone shipped with build number 14.4.A.0.157 of Kitkat (you can see this under Settings->About Phone). Unfortunately the "one-click" root solution doesn't work for this version or any other above 14.4.A.0.108. Instead we'll downgrade to .108 and root. If you're already at .108, skip this step. 
    1. Depending upon what version of Android your phone came with:
      1. If you have KitKat (Firmware 14.4.* / Android 4.4.*) then you can downgrade the kernel (only). Download the zip file from this guide and unzip the .108.ftf file.
      2. If you have Lollipop (Firmware 14.6.* / Android 5.*.*) then you must install the whole .108 firmware. This can be found here. You may have to use File->Switch Advanced, and select to wipe userdata (You will lose your user data in this case!) for step 4, in order to be able to boot.
    2. Put the .ftf file into the .flashTool/firmwares directory under your home directory (Eg, C:\Users\username\.flashTool\firmwares).
    3. Enable developer mode by tapping 7 times on the Android Build under Settings -> About Phone. Then under Settings -> Developer options, enable USB debugging. And under Settings -> Security, enable Unknown Sources.
    4. Run Flash tool; click the lightning button, select Flashmode. Select the A.0.108 kernel firmware file and hit Flash. Then follow directions to power down and attach your phone to the computer, while holding the volume down button until the flash process begins.
    5. Once complete, unplug the USB cable, close flashtool, and turn on the phone.
  4. Root the device using "one click" solution from here (in windows, the tool included in the zip from last step should work as well but is older). 
    1. Ensure USB debugging and unknown sources remain enabled, as above.
    2. Run install.bat in windows or install.sh on mac/linux.
    3. Wait until it tells you to connect the device via USB, and then do that.
    4. Now, wait until it tells you "Device Rooted", dismissing any prompts on your phone if they appear.
  5. Now that you can, backup using online nandroid backup software (get and install it and required BusyBox from the Google Play Store). Save all backups to external SD and/or computer. This includes the TA partition that is wiped if you bootloader unlock. To just backup that critical partition (needed to allow you to restore stock at some point if necessary), there's also this tool.
  6. Install dual recovery using installer. A recovery is like a custom BIOS that enables easier flashing of ROMs and recovery from errors. With this package you get two; you can open clockworkmod recovery by pressing the up arrow after the green/purple light flashes during bootup, and the TWRP recovery by pressing the down arrow. Sometimes one is needed rather than the other.
    1. Download installer Z1C-lockeddualrecovery2.8.25-RELEASE.combined.zip (or newer) from here. This version can be used both to install initially and later to flash.
    2. Unzip it (but keep the .zip for later) and run install.bat/install.sh. Choose (2) rooted with SuperUser. Connect phone when prompted and wait until complete. Reboot phone.
  7. Upgrade to Kitkat using this guide to create a pre-rooted firmware.
    1. Run flashtool to download the firmware version you want (14.6.A.0.368 or 14.6.A.1.236 either customized for your region or generic) by clicking the XF button, finding it and downloading by clicking its name on the far right, selecting to unpack automatically. This takes a while as it is big. Once complete, it will be in your .flashTool/firmwares directory.
    2. Download SuperSU
    3. Download PRFCreator, unzip it and run it.
      1. Choose the FTF file you just downloaded in flashtool.
      2. Choose the SuperSU binary you just downloaded.
      3. Choose the Z1C-lockeddualrecovery2.8.25-RELEASE.combined.zip you downloaded previously for the recovery.
      4. Select all of the checkboxes except "sign zip" (including "legacy mode" which is below sign zip) and click "Create". This will take a while.
      5. It will appear in the PRF directory as flashable-prerooted.zip. Copy this to the phone/SD card.
    4. Install the pre-rooted firmware.
      1. Reboot your phone into TWRP recovery by pressing the down arrow after the green/purple light blinks during bootup.
      2. Go to wipe, advanced wipe, choose dalvik cache and cache and wipe (maybe unnecessary but doesn't hurt).
      3. Then return to main menu and install. Find the flashable-prerooted.zip file and install it.
      4. Once again wipe dalvik and cache.
      5. Then reboot to system. It will take a while as the new OS is configured and apps are optimized. Don't fret, all this optimizing means the apps will run faster later on. The NFC firmware will also be updated. 
  8. Done! You now have a rooted phone with a locked bootloader running Lollipop 5.1.1!
To optionally install XPrivacy:
  1. Via the browser on your phone, download and install the latest XPosed Installer app from http://bit.ly/1LodTO5 (I used 3.0-alpha4). It won't work yet.
  2. Download the latest Xposed framework zip to your phone from the same link. The Z1Compact requires the 32-bit ARM version. For Android 5.1.* it's SDK22 (if you updated to 5.0.* instead, use SDK21). I used xposed-v80-sdk22-arm.zip. (SDK23 is for 6.* which likely won't be available on the Z1 compact).
  3. Reboot the phone into TWRP recovery by hitting the volume down button once the green/purple LED lights up during boot. Install the xposed SDK file zip you just downloaded and reboot to System. The Xposed Framework is now installed, the next bootup will take a while.
  4. On your phone, Now visit http://bit.ly/1QfkTxT and download and install the latest XPrivacy APK. Reboot the phone a second time.
  5. Go into Xposed installer, under modules, enable XPrivacy. Reboot the phone.
  6. XPrivacy can now be configured.
If you're a bit hesitant about all the steps, this can be a useful video to get the idea of how the tools work (though it's outdated and following a different procedure).


Thanks to: SlikToxic, WaleDac, Jamal, zxz0O0, and Muuuly who first found the components of this solution. And to all the linked app developers!

* Really appreciate making your purchase through these links as I'll get a small commission at no cost to you.

Friday, September 18, 2015

Creating Lightroom Web Gallery plugins

The basic reference is the Lightroom SDK Guide, Chapter 6. But the relevant section hasn't been updated since it was first written, and there's a lot missing. This forum could potentially be helpful but there isn't a lot about web plugins. There are also a LOT of quirks and bugs to workaround when creating lightroom galleries, and amazingly almost none of them are discussed on the net.

This is a very incomplete list of things I've encountered or learned:
  • When debugging, changes to luascript (*.lrweb) only update reliably by restarting Lightroom. Errors therein typically cause the gallery to disappear from the list of galleries. Changes to the HTML template code itself are updated whenever you change any gallery setting that triggers a preview browser refresh (or by switching to Library view and back). Errors in this HTML syntax typically (but not reliably) cause a web page showing an error message to appear. Sometimes things will just inexplicably not work.
    • New or modified broken web galleries and web templates will only appear after LR restart.
  • If you use manifest.lrweb's AddResources to actually move the files (ie, its purpose: the source and destination differ), then most if not all the resources will not be available when rendering the preview. One workaround is to then explicitly AddResource or AddPage for each file that's actually used in the preview. But this has problems too. I wound up using AddResources with the same source and destination directories.
    • It's important that your pages (referenced in e.g. AddPage() or AddGridPages())  NOT be in your source directory for AddResources. They may however both have the same destination directories.
  • In Windows, Lightroom 4 appears to use an internet explorer 6 or 7 rendering engine for the internal preview web page, so sadly this needs to be a target of your gallery. Debugging it in IE 7 (or at least a later version running with F12 compatibility mode for IE 7) is helpful to get it working in the preview mode (since I haven't figured out any facilities for debugging the actual preview album within lightroom). Not sure about other versions of LR or on a Mac.
  • Correction: It turns out Lightroom 4 is actually using a modified build of the webkit library used by Safari 4.0.3 (released in August 2009) - the user agent string is "Mozilla/5.0 (Windows; U; en-US) AppleWebKit/531.9 (KHTML, like Gecko) AdobeAIR/2.7.1". Which is also seriously old too, but at least you can download it and test with this old Safari version outside lightroom, which I highly recommend if you're having trouble.
  • There is a maximum of one level of indirection when referencing variables in galleryinfo.lrweb. E.g., if you want variable A to depend upon the value of another (using the function() syntax) and others to depend upon variable A, it's not possible.
  • Variables names like "nonCSS.text.name" are actually twice-nested lua tables. Hyphens are not allowed in such names (are you subtracting?). To workaround this, you can express it as such: nonCSS.text["hyphenated-name"].
  • Typical methods of debugging the lightroom preview webpage are unavailable (alerts, console logs, inspecting the dom, etc). live_update.js provides an AgDebugPrint() function, but I have no idea how or if it's possible to see output from this call. But one thing you can do is make a "debug" div and insert things into the content of that div to be displayed on page. Primitive, but helpful - I wish I'd thought of it sooner.
    • Also, lightroom puts the preview album in the temporary folder named AgWPGPreview-### (eg, C:\Users\username\AppData\Local\Temp\AgWPGPreview-21). Inspecting the files here can tip you off about what may be going wrong when viewing inside LR (note that the images are not written here, or at least not named as you'd expect).
    • Of course, it's useful to export the gallery and use typical browser debugging tools as well.
  • If you want to support live update, you need to set the variable supportsLiveUpdate = true in galleryinfo.lrweb. This is unmentioned in all documentation. For debugging it's best to turn off to ensure things update as mentioned above. live_update.js calls methods under the variable 'myCallback', but checking for this variable's existence fails and causes live_update to bonk, even under lightroom preview. That means we can't check, so the code will give errors outside the preview (if testing- it shouldn't be included in the export anyway).
  • For every metadata item you'd like to use for images (eg, title or gps location), you need to include them in a perImageSetting. These then need to be provided in the properties, perImage field of the GUI to be actually provided (it would also work if you don't provide a properties block, but then these settings will appear in random order on the GUI). Useful ones include com.adobe.X where X can be: caption, title, location (which is actually sublocation), city, state, country, GPS, and many more (all undocumented). If you name it as perImageSetting.title, it will be available under the image's metadata.title field in LuaPages. A longer list of properties is here.
  • Luascript in LuaPages can be really tough to debug. I now do one small change at a time and check for failures by reloading the preview window and checking the generated preview html. One thing to note is that there seems to be only one pass-through by the interpreter and thus functions must be defined before they are used.
  • If in your LuaPages you have long sections of html/javascript/etc with no luascript elements, then you may get the error "chunk has too many syntax levels". You can cure it by placing luascript comments e.g., <% --[[ Comment here ]] %> to break up the offending section.
  • When making Lightroom UI elements with titles, you can use "\n" to break up long lines in the text. But, if you use the LOC function to localize the text and use other languages, there does not appear to be any way to break up lines. Thus other languages must fit on one line.
  • Variables starting with "appearance." have magic powers in that they trigger a request to update the appearance of the webpage in the UI; other variables won't trigger refresh. Lightroom sends such changes to the web page's document.liveUpdate() function to determine how much of the page needs to be regenerated. I found that the return value "invalidateOldHTML" is almost always what I needed, and so I replaced the provided function to always return this (YMMV). Variables starting with "metadata" will be treated as text and remove any potential html tags. It also updates like those with "appearance".
Please share any more that you know about and/or know how to work around. Or if you're stuck and need a hand, perhaps it's something I've encountered. Ask in the comments.

Thursday, September 10, 2015

CMake / Visual Studio "the parameter is incorrect" error

If you're trying to run configure on a build project with CMake for the first time on this computer, and while trying to detect the C/C++ compiler features, it bonks inexplicably. You have Visual Studio installed correctly after all, and it builds things without problems both within the GUI and from the command line. Inspecting the logs, you see that the errors occur when CMake is trying to compile an internal file such as CMakeCXXCompilerId.cpp using the '@' feature of the compiler to provide command line parameters via file. The only reported error is from the compiler saying that "the parameter is incorrect".

The problem turned out to be caused by BeyondTrust's Trusted Desktop software (which is corporate security software). Running 'elevated' did not help. But removing Trusted Desktop altogether made the problem go away.

In my case, this occurred on Windows 7, with Visual Studio Professional 2010, 2010sp1 and 2013 Express versions, and CMake 3.3.1. But I suspect it's not very sensitive to these versions. Since I reached the end of the internet trying to figure this out, hopefully this will help someone.

(While I'm at it, I also happen to know that Trusted Desktop is incompatible with recent versions of Oracle VirtualBox. Versions since 4.3.12 have hardened security features, verifying that DLLs are what they say they are. But these features fail under Trusted Desktop, making it impossible to run VMs. The workaround is to use version 4.3.12, which predates these features.)

Wednesday, August 26, 2015

Fancy, Semantic tooltips with CSS only

I came across this post describing a way of allowing control over the appearance of tooltips in a semantic way that avoids too much extra markup and doesn't trip up screen readers. Really good idea.

Tooltip shown when hovering over the first really

I made a couple modifications to allow it to work with a href tags as well as non-link spans, eg:

<p>I <a href="#" data-tt="I mean really, really" class="tt">really</a> like pie.</p>

or

<p>I <span data-tt="I mean really, really" class="tt">really</span> like pie.</p>

I also spiced it up some and made it so it doesn't appear immediately, but only after hovering for a bit, and then transitions in gracefully.

Finally, since tooltips may be enclosed in a container with overflow hidden, or near the right edge of the viewport, I added some code to choose the positioning for each tooltip (lower left, lower right, upper left, or the default: upper right). When set appropriately, this ensures they can be seen.

Best of all it seems to be supported by essentially all browsers, including back to at least IE6.

Here's the CSS:

.tt {
  position: relative;
  cursor: pointer;
  outline: 0;
}
.tt:after {
  content: attr(data-tt);
  position: absolute;
  left: 1.7em;
  top: -1.7em;
  white-space: nowrap;
  color: #FFF;
  background: rgba(0, 0, 0, 0.8);
  padding: 3px 7px;
  border-radius: 3px;
  -moz-border-radius: 3px;
  -webkit-border-radius: 3px;
  margin-left: 7px;
  border: 1px solid gray;
  margin-top: -3px;
  transition-delay: 0s;
  visibility: hidden;
  opacity:0.0;
}
.tt:hover:after {
  visibility:visible;
  opacity: 1.0;
  transition-delay: .5s;
  -webkit-transition-delay: .5s;
  transition-duration: .4s;
  -webkit-transition-duration: .4s;
  transition-timing-function: ease-in;
  -webkit-transition-timing-function: ease-in;
}
.tt-lr:after {
  top: 1.7em;  
}
.tt-ll:after {
  top: 1.7em;
  left: auto;
  right: 1.7em;
}
.tt-ul:after {
  left: auto;
  right: 1.7em;
}


You can see it in action here